Lately, I swear– Crate and Barrel is out to get me. Within a three day period, I received a new catalogue (swoon), TWO 25% off discount mailers, and a “pre-approved” Crate and Barrel credit card.. can you say 10% back in reward points?! Not to mention the countless emails: free shipping!, 30% off rugs, farm to table looks, 70% off outlet sale… I’m this close to caving.
For as long as I can remember, I’ve subscribed to home decor and kitchen retail store newsletters, catalogues, ect. Pottery Barn, Crate and Barrel, West Elm… when I would get their monthly catalogue in the mail I’d sit for hours and mark the pages I loved. Building an inspiration board in my head of an open, bright kitchen and what I wanted my future kid’s bedrooms to look like. And yet, I was just a kid myself. To this day I continue to go gaga over interior design and styling with an exception I now use Pinterest instead of a mental board. What remains is my love for flipping through a new catalogue and getting inspired from the products I adore.
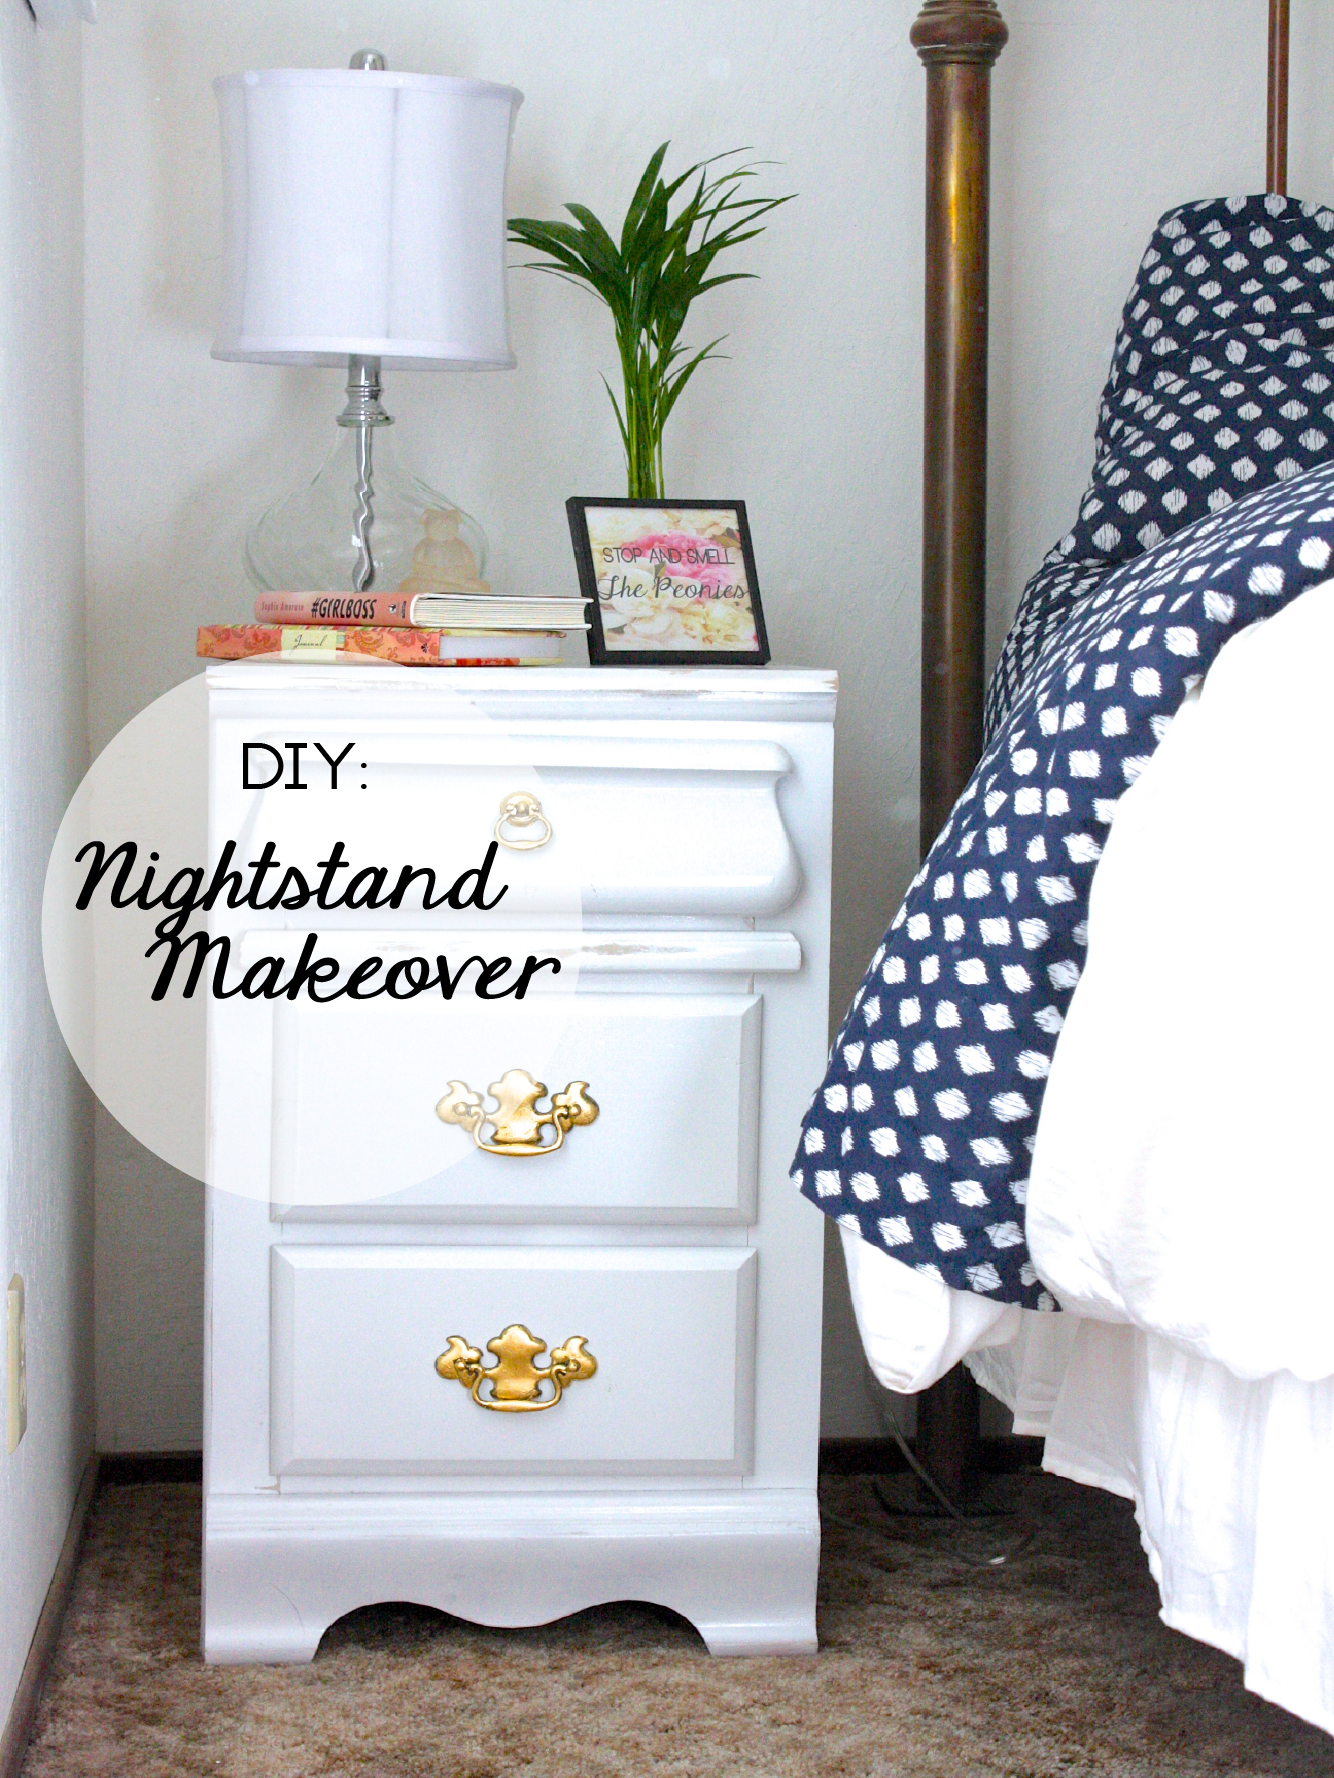
For two years I’ve slept next to an old, makeshift, hand-me-down nightstand. What was once a desk, we turned into a “stand in” nightstand until we could get settled after moving.. as I mentioned that was two years ago. Although, mentally I’m at a point where I’d splurge on the right pieces to complete the decor in my home, I have some sort of road block not to do so until I own a home. There’s something about renting and buying furniture for a “temporary” place that gets me. So, in the meantime, I choose to decorate with what I have– which in my opinion, still works! Also, I’m a firm believer to not spend beyond your means. There will come a day when dropping $2K on a Mallorca Marble dining table will be no big deal. But until then, we work with what we got.
Supplies:
- Weathered piece of furniture, in this case a nightstand.
- Few different types ( and multiple sheets) of sand paper. Choose coarse sandpaper measuring 40- to 60-grit (for heavy sanding) and 80- to 120-grit (for smoothing surfaces and removing small imperfections).
- 2-3 cans of white spray paint. Be sure to choose a paint + primer in one, gloss duo.
- Hardware to match.
- 1 roll of marble contact paper ( you can find this at your local Lowes).
Instructions:
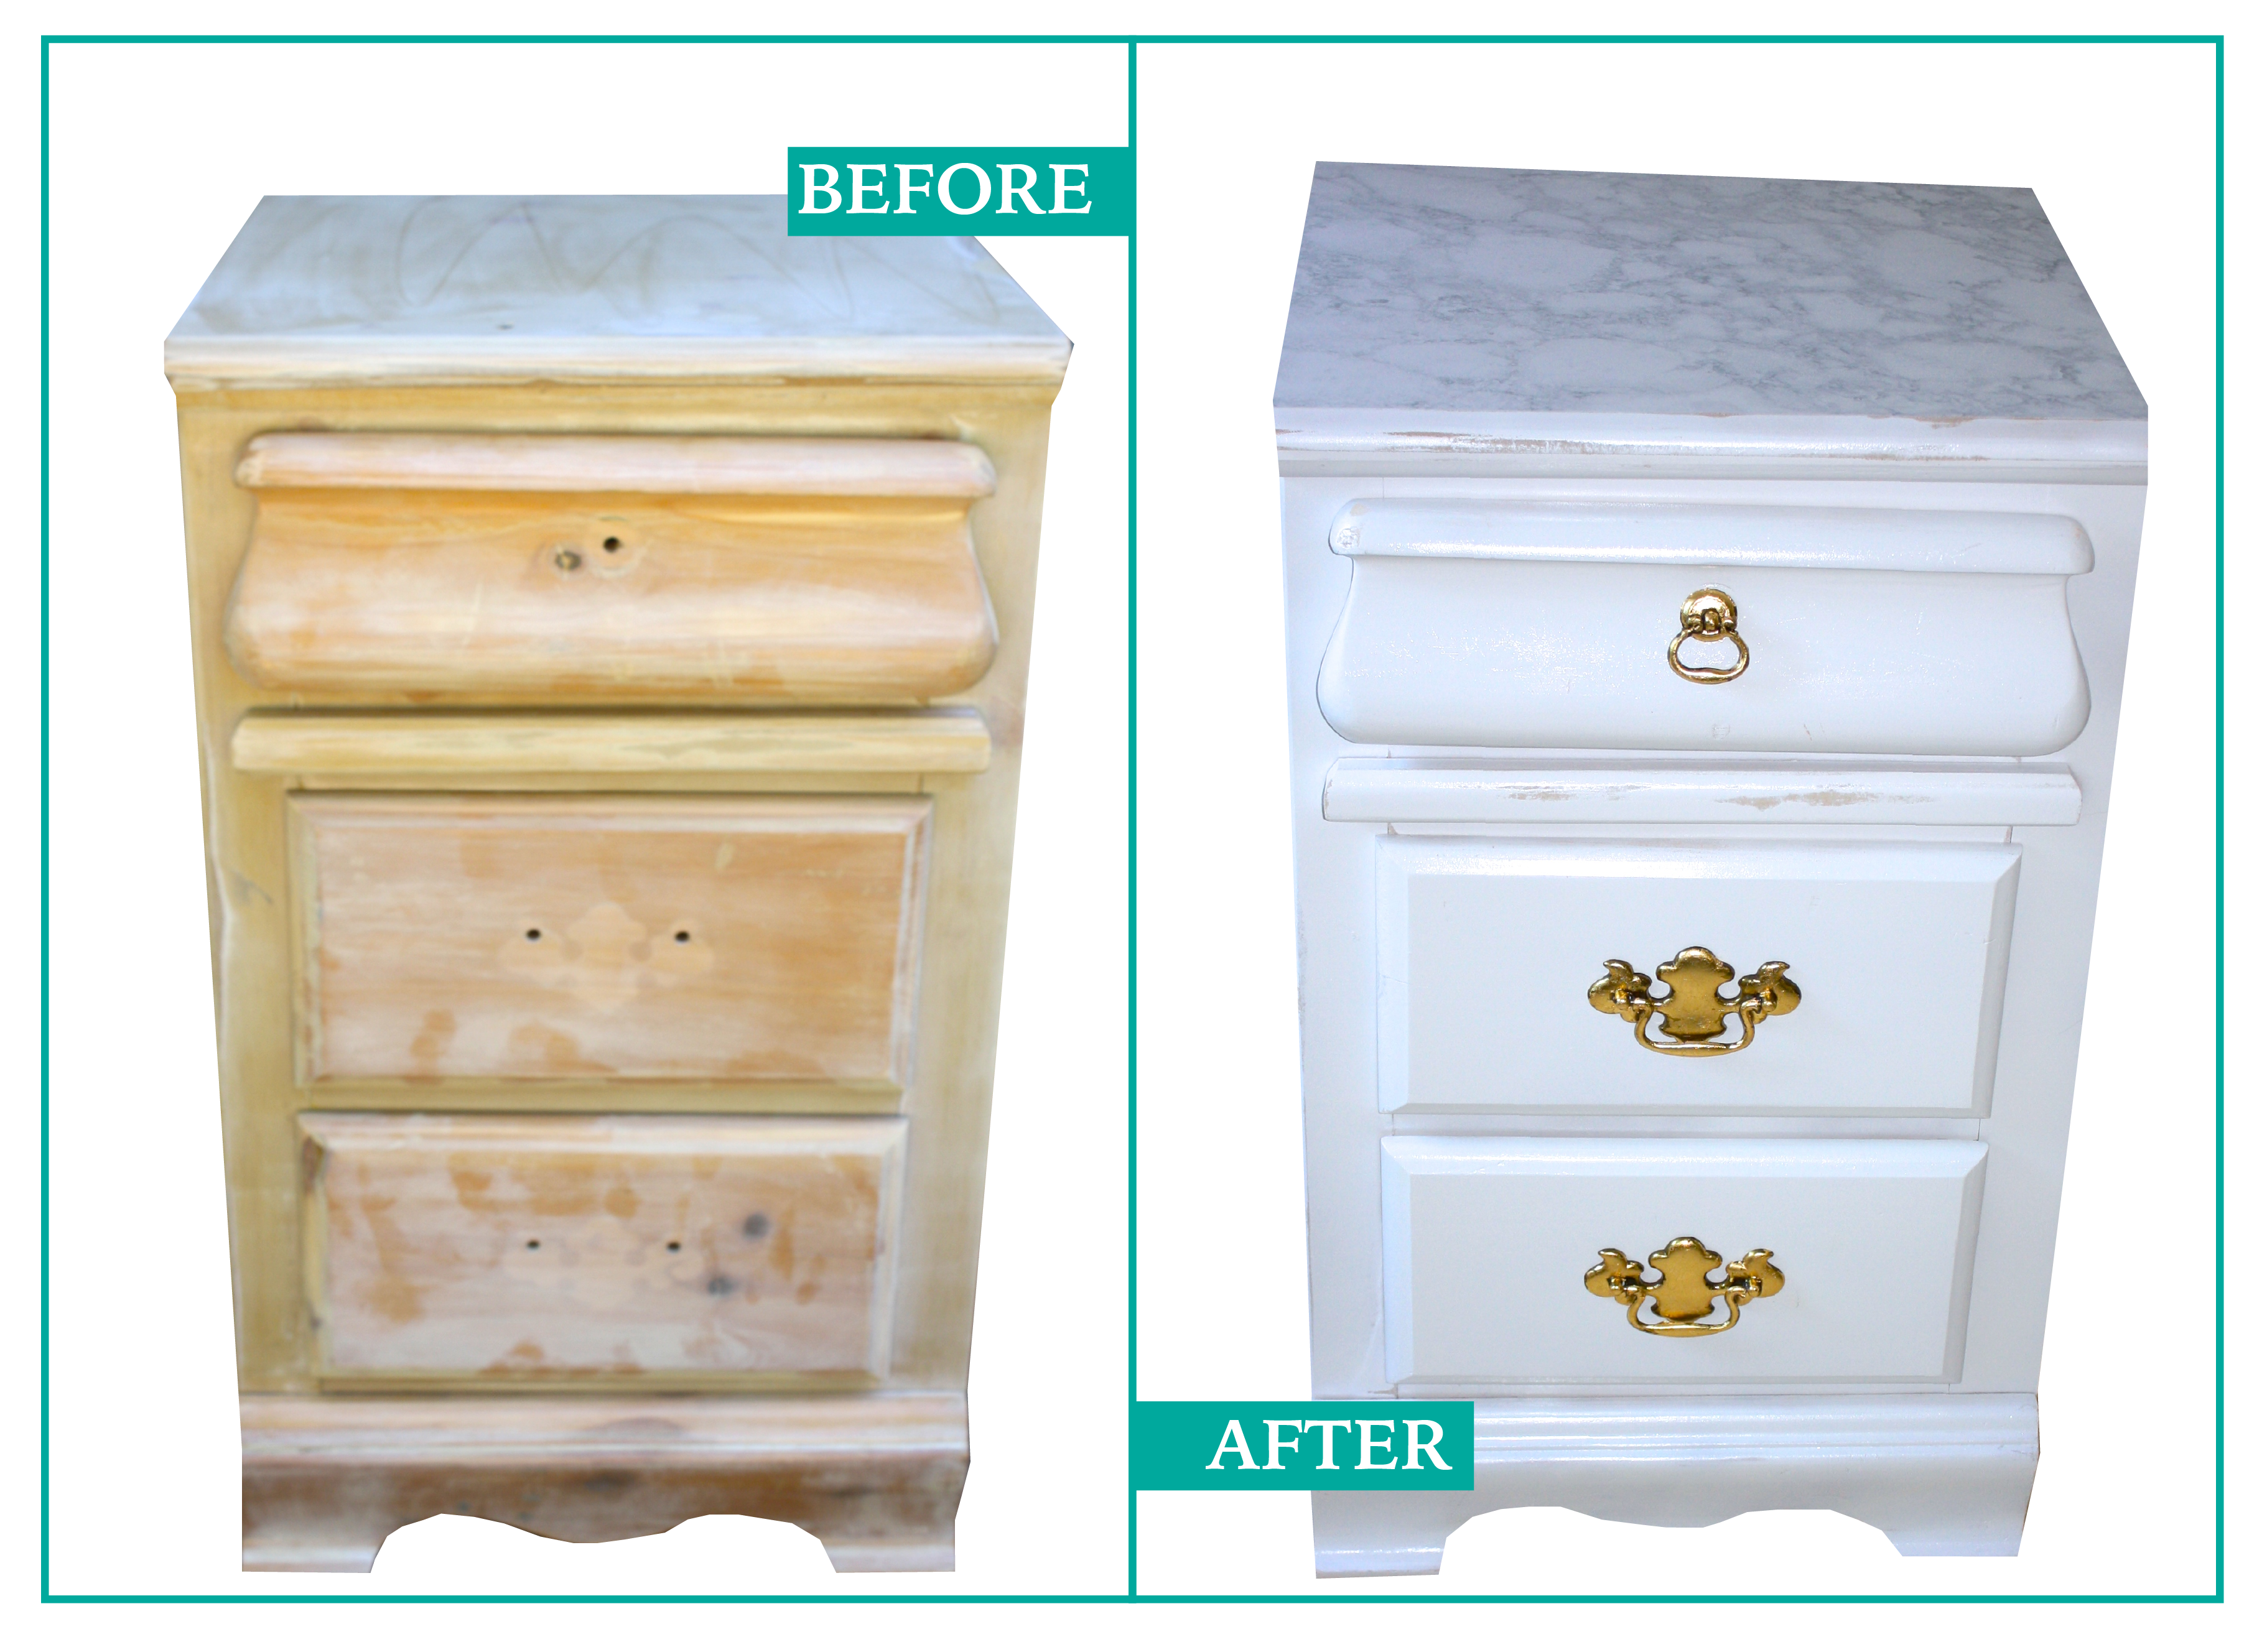
- Wipe down your piece of furniture to remove any dust, spills or easily cleaned scuffs and remove hardware ( it is has any).
- Start sanding! Go over the entire outside of the object with your sandpaper removing the current finish, marks, dents, ect.
- After you’re done sanding, take a damp cloth and wipe away the dust.
- In a well ventilated, open space spray paint each piece separately. In this case I had 3 drawers, and nightstand itself. *Note: B sure to lay down a protective sheet or tarp and be cautious of overspray, as spray paint tends to drift.
- Follow drying instructions on spray can and allow items to draw. In the meantime, prepare your new hardware or refurbish your old hardware (like I did above).
- Assemble and style!


Beautiful!