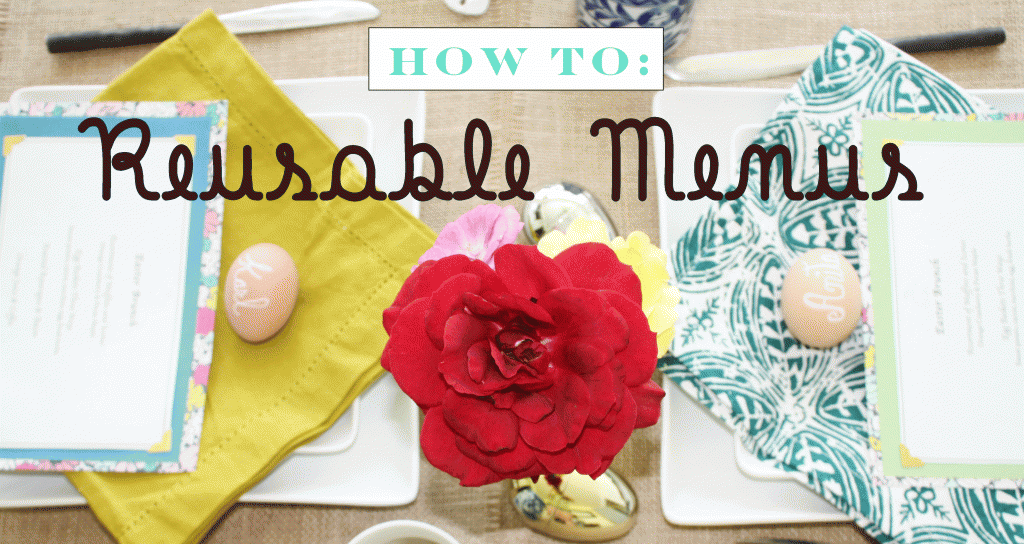
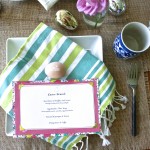
Perfect for Any Occasion
First off, I hope everyone had a lovely Easter! (better late than never, right?) Unfortunately, it’s been awhile since I’ve been able to post. With a few work deadlines, a lovely cold (Thanks, Karl), and of course just the everyday stuff (aka taxes, ew.), my schedule has been a bit all over the place. But don’t worry, I haven’t forgotten about you or this lovely little space. I’m the type of person even when I’m sick, sleeping horribly, and running around like a crazy woman, I have a hard time just relaxing. Some might think, “hey you’re sick, perfect time for writing!” But, more like the opposite. The last thing I want to do is sit in bed all day.
Since it was Easter this past week, I had a list of wonderful festive recipes planned to share. But, as I mentioned time got away from me a bit, so those will have to wait until another occasion. Oh, the suspense! Luckily, this How-to is perfect for any occasion all-year-round. And, it doesn’t require a ton of time, money, or waste — which is the best part!
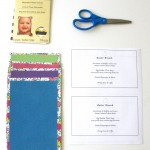
What you need:
Scissors
Ruler
5 sheets of scrapbook paper. **Choose your favorite print, not holiday or event specific. Example: a floral or chevron print is great, nothing that says Baby’s first birthday or has little santa hats on it.
5 sheets of solid colored card stock paper to match the printed paper.
Emler’s Spray adhesive
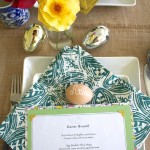
Decorative photo corners– gold, silver or white. I used gold shown in picture. **you will need a total of 20 for 5 place settlings. (4 per menu)
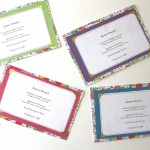
1. Determine the size of Menu you want to have. Remember you will be layering paper, so don’t choose something too big or too small. Cut your print pieces first– I like to make it 6×9.
2. Next, cut your solid pieces so that when layering it with your print piece, you have about a half inch border around them. I cut my solid pieces about 5.5 x 8.5
3. On a covered surface, spray adhesive on the back of the solid piece, and layer over the printed piece. **Note, you might want to have two areas set up to do this, the adhesive can scatter, leaving a coat of tackiness on your covered areas.
4. Repeat step 2 and 3 until you have 5 menus of two layers.
5. Take the decorative corners and evenly space them on each menu. If you’re following my example, you will want to space them evenly to fit the last interchangeable layer 4.5 x 7.5
6. Type up your menu in a word document and print, and slide corners in!
