I’m not sure why, but I have the weirdest obsession with saving glass jars, bottles, vases, etc. I guess Prepping for the time I need centerpieces for a party of 100? I think I get it from my dad… The man (who I must mention is a glass blowing/ball collecting fanatic), once saved boxes and boxes of empty Pellegino bottles for an illuminated “blue wall” display… uhh yeah, I think I get it from him.
I also have an obsession with fresh flowers. But, what woman doesn’t? There is nothing that brightens and completes a room more than a bouquet of gorgeous marigolds, tulips, roses, peonies, ahh I adore them all. In the DIY world, chalkboard has been a huge trend. Not going to lie, I’m guilty of a few chalkboard projects myself… and by a few, I mean like 10. Whoopsies #chalkboardsarefun
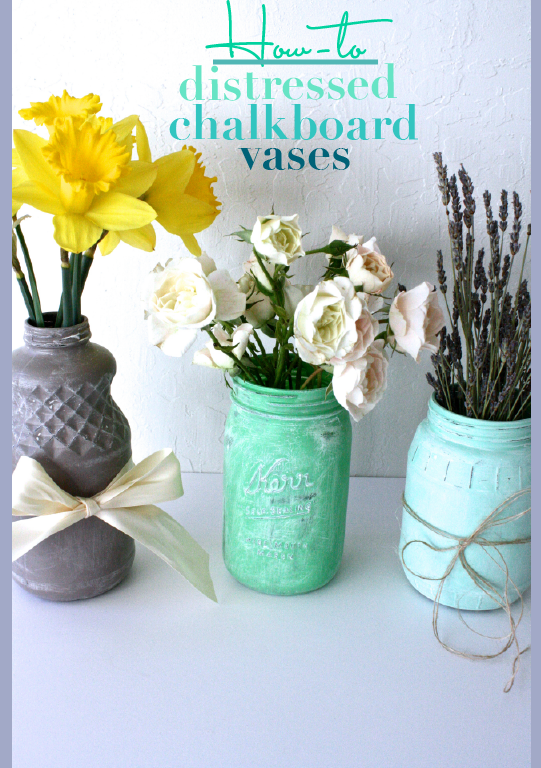
Of the million mason jar and glass bottle projects I have seen, one that caught my eye in particular was these vintage beauties. This technique is so simple and fun it dresses up any table-setting or space with it’s rustic, vintage, but elegant look.
Supplies:
- Martha Stewart Crafts chalk paint (green, grey and clear)
- mason jars, glass bottles and tin cans (all with texture!)
- 100 grit sandpaper
- soft bristled paint brush
- white chalk
- wax paper/parchment paper
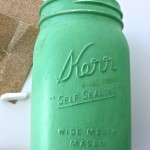
On wax paper, start painting your first coat of chalkboard paint onto your jar with a soft bristled brush. *The softer the brush, the better=less lines/streaks. Let the first coat dry completely, waiting at least 1 hour before applying the second coat. Apply second coat after an hour or so, then leave jars to dry completely over night.
For lighter/darker variations and shades feel free to mix paints!
Once the paint has dried for 24 hours, you are ready to sand! Take sandpaper and gently sand the paint off the raised design areas and other areas you want textured. *Don’t forget the top!
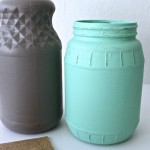
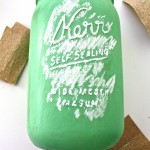
Now, time for the chalk. To finish the distressed look, rub the entire jar with chalk. Once the jar is covered, wipe the chalk dust away with your fingers and then go back and add a little more for decoration. You will see how instantly, the chalk completes the distressed look!
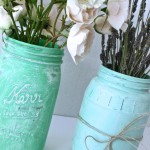
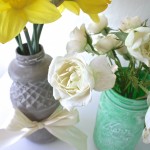
Wala! Simple, Vintage, and Fabulous! {Say in Oprah voice}
Add your favorite flowers, paper straws or party favors to complete your theme!
